How to Lay Stones in Garden
Introduction to Garden Stone Landscaping
Creating a beautiful garden isn’t just about plants and flowers—stones play a key role in turning your outdoor space into something truly special. Whether you’re aiming for a rustic pathway, a minimalist patio, or a charming rock border around your flower beds, incorporating stones adds both functionality and aesthetic appeal to your landscape. They offer a timeless elegance, require low maintenance, and can withstand the test of time and weather far better than many other materials.
Why Choose Stones for Your Garden
Stones are incredibly versatile. From stepping stones that guide your footsteps through lush greenery to gravel paths that crunch pleasantly underfoot, they add texture, contrast, and structure to a garden. Unlike wooden decks or plastic edging, stones don’t rot, fade, or warp. They’re natural, durable, and suitable for every garden style—from Zen gardens to English countryside themes.
Moreover, stones are available in countless shapes, colors, and sizes. You can mix and match to suit your vision. Want a Mediterranean feel? Use terracotta-toned pavers. Prefer a modern, clean aesthetic? Sleek slate or granite might be your go-to. Plus, stones help with erosion control, make muddy areas walkable, and even keep pests at bay.
Benefits of Using Stones in Landscaping
Aside from their visual appeal, stones offer numerous functional benefits:
Low Maintenance: Unlike grass, which needs mowing, watering, and fertilizing, stones are set-it-and-forget-it.
Durability: They withstand rain, sun, snow, and foot traffic without much wear.
Drainage: Stones allow water to pass through, preventing puddles and erosion.
Weed Control: A properly laid stone path with landscape fabric underneath greatly reduces weed growth.
Eco-Friendly: Natural stone is sustainable, especially if sourced locally or recycled from other projects.
Choosing stones is an investment in the longevity and beauty of your garden. They’re not just a stylistic choice—they’re a practical one.
Planning Your Garden Stone Layout
Before you start hauling stones into your backyard, you need a game plan. Laying stones without a vision can lead to uneven surfaces, poor drainage, and a design that doesn’t quite work with your existing landscape. Planning is the backbone of a successful garden stone project.
Visualizing the Final Look
Think about how you want your garden to function. Do you need a walking path? A place to sit? A decorative border? Sketch out your ideas or use garden design software to visualize how the stones will integrate with the rest of your garden elements.
Ask yourself:
Where is the main focal point of the garden?
How will the path or stones guide the eye or flow of movement?
Are you going for straight, modern lines or winding, natural curves?
Use markers or string to outline where the stones will go. This helps you see the proportions and make adjustments before you do any heavy lifting. If you’re adding a path, consider how wide it needs to be—generally, 2 to 3 feet is comfortable for walking.
Choosing the Right Type of Stones
Not all stones are created equal. Your choice depends on both style and function:
Flagstones: Ideal for patios and walkways, offering a flat surface and rustic look.
Gravel: Great for casual paths and driveways, easy to install and excellent for drainage.
Cobblestones: Durable and classic, perfect for high-traffic areas.
River rocks: Smooth and round, best used for decorative borders or dry creek beds.
Slate or granite tiles: For a sleek, modern look, often used in contemporary gardens.
Keep in mind the color palette of your house and garden. You want the stones to complement—not clash with—the surrounding elements. Also, think about texture. Smooth stones are easier to walk on, while rough ones may be slippery when wet or uncomfortable underfoot.
Tools and Materials You’ll Need
Getting the right tools from the start saves you time, frustration, and possibly even injury. You don’t need a contractor’s truckload of gear, but a few essentials make the job easier and the outcome more professional.
Basic Tools for Stone Laying
Here’s a checklist of must-have tools for your garden stone project:
Shovel: For digging and moving soil or gravel.
Wheelbarrow: To transport stones and heavy materials easily.
Landscape fabric: Helps suppress weeds and separates soil from gravel.
Rubber mallet: For tapping stones into place without damaging them.
Level: Essential for keeping the stones even and safe to walk on.
Garden hose or string: For outlining curves or straight paths.
Measuring tape: To ensure consistent spacing and dimensions.
Garden rake: For smoothing gravel and dirt.
Safety Equipment and Preparations
Working with heavy stones can be physically demanding. Protect yourself with:
Gloves: To avoid cuts and blisters.
Knee pads: If you'll be kneeling for long periods.
Steel-toed boots: In case a stone slips while you're moving it.
Protective eyewear: If you're cutting or chipping stones.
Also, check for underground utilities before digging. Call your local utility company or use an underground locator service. Better safe than sorry!
Preparing the Garden Area
Now that you’ve got your tools and plan, it’s time to roll up your sleeves. Proper preparation ensures that your stones will sit flat, stay in place, and drain well—so don’t skip this step!
Clearing and Cleaning the Area
Start by removing any grass, plants, debris, or old landscaping elements from the area where the stones will go. You want a clean slate. Use a shovel or sod cutter to remove turf and dig down 4 to 6 inches if you're laying a path or patio.
Once the area is clear, use a rake to smooth out the surface. Make sure it’s even and free of roots or rocks that could interfere with your stone base. If the area tends to collect water, consider slightly grading it or adding a drain system underneath.
Measuring and Marking the Layout
Now bring your design to life on the ground. Use string, garden hose, or marking spray paint to outline the shape of your stone area. For curved paths, a hose works best—it gives you the flexibility to play with shapes and adjust curves naturally.
Use stakes to hold the string in place, then double-check your measurements. Is the path wide enough? Are the curves smooth and walkable? This step lets you visualize spacing and orientation before committing.
Once everything is marked, step back and take a look. Walk the intended path. Does it feel natural? Make any necessary tweaks before you start laying stones. Trust your instincts here—it’s much easier to adjust now than after the stones are in place.
Building a Solid Foundation
Every great stone path starts with what’s beneath the stones. Without a strong base, your beautiful path could end up uneven, sunken, or wobbly after the first rain. The secret? A properly prepared base layer that gives your stones the support they need.
Importance of a Stable Base
Imagine walking on a floor where every tile wiggles or tips—frustrating, right? That’s what happens when you skip building a proper foundation. The base supports the stones and prevents them from shifting due to foot traffic, water erosion, or soil movement.
The most common base materials are compacted gravel or crushed stone, topped with a thin layer of sand. This combo creates a surface that’s both firm and flexible.
Laying Gravel or Sand as Base Layer
Here’s how to do it right:
Dig the base area: Aim for 4–6 inches deep for paths and up to 8 inches for driveways or patios.
Add landscape fabric: This prevents weed growth and keeps the gravel from mixing with the soil.
Pour in the gravel: Use crushed stone or road base gravel. Add about 3–4 inches and spread it evenly.
Compact it: Rent or borrow a plate compactor to press the gravel firmly into place. This step is non-negotiable—it ensures stability.
Add a layer of sand: On top of the gravel, spread 1–2 inches of sand. Use a screed board to level it out.
This layered base acts like a shock absorber, keeping the stones level while letting water drain through.
Setting the Stones in Place
Now comes the satisfying part—laying down the stones and seeing your vision start to take shape. This is where creativity meets craftsmanship. You’ll be arranging the stones not just for looks, but for comfort and practicality. Getting them to sit flat and evenly spaced makes all the difference between a pro-level path and a clumsy, uneven mess.
Arranging Stones Aesthetically
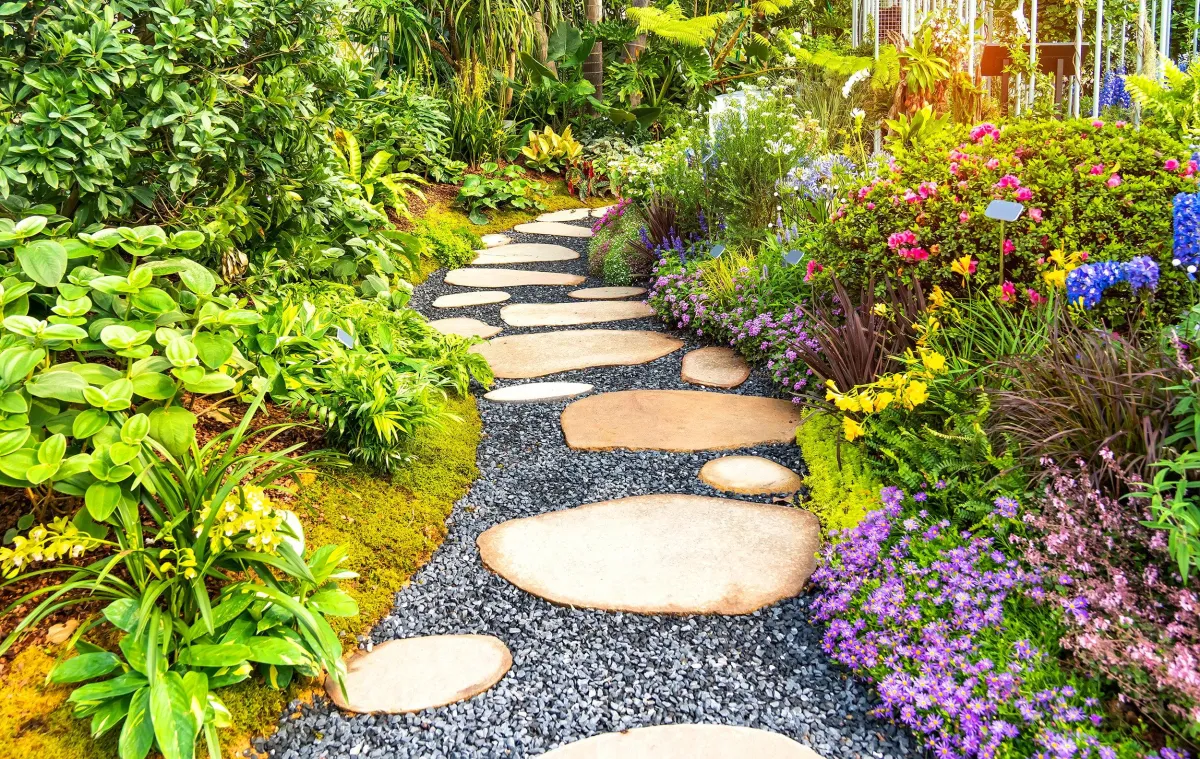
When arranging the stones, treat them like pieces of a puzzle. Start by placing the largest or most visually dominant stones first—these are your anchors. Then, fill in the spaces around them with smaller stones. For a natural path, avoid straight lines and regular spacing. Let it flow. Winding or curved layouts often look more organic and inviting than rigid, linear ones.
Here are some pro tips:
Dry fit first: Before setting anything permanently, lay the stones out and walk on them. Do they feel comfortable? Is the spacing right for natural steps?
Aim for consistency: Keep about the same distance between each stepping stone—usually 2 to 3 feet, depending on your stride.
Use symmetry sparingly: Randomized patterns often look more natural than perfectly symmetrical designs, especially in garden settings.
You can also mix different types of stones for a unique, eclectic look. Just ensure they’re all flat enough to walk on safely.
Techniques for Leveling Each Stone
A wobbly stone isn’t just annoying—it’s a tripping hazard. That’s why leveling each stone correctly is essential. Here’s how to do it:
Place the stone on the sand base.
Press it down slightly by hand or gently with a rubber mallet.
Use a level to check that it’s flat. Make sure it’s also level with adjacent stones.
Adjust as needed: Add or remove sand under the stone to raise or lower it until it’s perfect.
Don’t rush this part. Take your time. Once all the stones are set, walk across the surface and test for wobbles. If anything shifts, fix it now rather than later.
Securing the Stones
Once your stones are in place, the next step is making sure they stay there. If left loose, they’ll shift over time due to foot traffic, rain, or ground movement. Securing the stones properly not only ensures safety but also preserves the visual integrity of your layout.
Filling the Gaps Between Stones
Depending on the design and function of your stone layout, you have several options for filling the spaces between stones:
Sand: Sweep polymeric sand into the joints for tight seams. It hardens when wet, preventing weeds and insects.
Pea Gravel: Offers a natural look and drains well but may shift over time.
Mortar or Cement: Ideal for permanent installations like patios or steps, but it reduces permeability.
Ground Cover Plants: For a more organic feel, consider creeping thyme, moss, or Irish moss. These soft greens add color and help blend stones into the garden.
To apply sand or gravel, simply spread it across the stones and sweep it into the joints. Water it gently to settle the material. For plants, tuck them into the soil gaps and water generously during the first few weeks.
Compacting and Stabilizing the Surface
Once the gaps are filled, you’ll need to compact the surface. If you used polymeric sand, lightly water the area to activate its binding agents. Be careful not to wash the sand out—just mist it enough to set.
If you used gravel or loose fillers, tamp the area down using a plate compactor or hand tamper. This presses everything into place and prevents shifting.
Test the path again by walking over it. If any stones move or wobble, lift them out and adjust the base underneath. Add more sand or gravel, re-level, and tamp again.
Finishing Touches
With the stones in place and secured, it’s time to add the final details that take your garden project from good to wow. These finishing touches define the space, make it feel intentional, and give your garden a polished look.
Adding Edging for Neatness
Edging not only makes your path look tidy—it keeps your stones from spreading out over time. Here are a few popular edging materials:
Metal or plastic edging: Discreet and easy to install. They’re flexible and perfect for curved paths.
Brick or stone edging: Adds visual weight and pairs well with stone paths for a cohesive look.
Timber borders: Great for rustic gardens, though they may not last as long as other materials.
To install edging, dig a shallow trench along both sides of the path and embed the edging material about halfway into the soil. Make sure it’s level and secure.
Decorative Ideas to Enhance the Look
Add personal flair and blend the stones into the overall landscape design:
Lighting: Solar path lights or low-voltage LEDs make your garden usable at night and highlight the stonework.
Ornamental plants: Use shrubs, ornamental grasses, or flowering borders to soften the edges.
Statues or garden art: Place subtle features like lanterns, urns, or small sculptures along the path to draw the eye.
Water features: A fountain, birdbath, or mini pond near your stonework can create a tranquil atmosphere.
Even a simple path can become a highlight of your garden with the right accents. Think of your stone layout as the backbone—everything else adds depth and personality.
Maintenance Tips for Stone Paths
Now that your garden stones are set, you’ll want them to stay beautiful and functional for years to come. Luckily, stone paths require very little maintenance—but a little regular care goes a long way in preserving their charm and stability.
Preventing Weed Growth
Weeds are sneaky. Even with landscape fabric, some may poke through eventually. Here’s how to keep them in check:
Spot treatment: Pull out weeds by hand when they’re small. Use a weeding tool to get deep roots.
Boiling water or vinegar: Eco-friendly ways to kill weeds between stones.
Pre-emergent herbicide: Use this in early spring to stop weeds before they sprout (if you're okay with chemicals).
Top off joints: Reapply polymeric sand or gravel as needed to maintain tight seams that discourage weeds.
Cleaning and Seasonal Upkeep
Every few months, especially after heavy rain or windstorms, give your stones a quick refresh:
Sweep regularly: Leaves, dirt, and debris can stain or shift the stones.
Power wash: For deep cleaning, use a gentle setting on a pressure washer to remove algae, moss, or mildew.
Replace loose fillers: If gravel or sand gets washed away, refill and tamp it down.
Check for damage: Look for any cracked or sunken stones and fix them before they become a hazard.
In winter climates, avoid using salt or harsh de-icers—they can damage natural stone. Instead, use sand or eco-safe de-icing products.
Common Mistakes to Avoid
Laying garden stones may seem simple, but a few missteps can turn your outdoor project into a frustrating mess. Whether you're new to landscaping or a seasoned DIYer, knowing what not to do is just as important as knowing what to do. These common mistakes can cost you time, money, and effort—so avoid them from the start.
Ignoring Drainage Considerations
One of the biggest blunders is forgetting about water flow. Stones laid on flat, poorly-drained ground can lead to puddles, muddy messes, and long-term erosion. Without proper drainage, water will pool around your stones, causing them to shift, sink, or grow moss and mildew.
To avoid this:
Always grade the area slightly to encourage water runoff.
Incorporate gravel or sand bases that allow water to filter through.
For heavy rainfall areas, consider French drains or perforated pipes underneath the path.
Choosing the Wrong Stone Type
Looks can be deceiving. Some stones may look stunning but are totally impractical for outdoor paths. For example, smooth river stones are beautiful but dangerously slippery when wet. Soft stones like limestone or sandstone may wear down quickly underfoot or crumble in freezing weather.
Do your homework:
Use flagstones or pavers for walkways.
Reserve polished or decorative stones for borders or flower beds.
Make sure all stones used for walking areas have a flat, stable surface.
Also, consider local climate. If your region experiences extreme temperature changes, go with weather-resistant stones like granite, slate, or concrete pavers designed for outdoor use.
Budgeting Your Stone Garden Project
Planning your garden stone project isn’t just about design—it’s also about dollars. Landscaping with stone can be affordable or pricey depending on your choices. The key is to plan realistically and balance cost with quality to get the best value for your investment.
Cost of Stones and Materials
The price range for stones can vary widely based on the type, size, and origin:
Gravel or crushed stone: $30–$50 per ton
Flagstone: $2–$6 per square foot
Slate or granite tiles: $4–$10 per square foot
Decorative stones or pebbles: $100+ per ton
Don’t forget to factor in other materials like:
Landscape fabric
Sand or gravel for the base
Edging materials
Tools (if you don’t already own them)
In total, a small DIY stone path might cost as little as $200–$500. A larger patio-style setup could run well into the thousands.
DIY vs Professional Installation
Going the DIY route saves labor costs, but it also demands more time and physical effort. If you enjoy hands-on work and already have basic tools, DIY might be the way to go. However, if your project involves heavy stones, intricate designs, or site complications (like steep slopes), hiring a pro ensures safety and structural integrity.
Professional installation typically costs $10–$30 per square foot depending on the complexity. This price includes materials, labor, and equipment. It’s more expensive—but you get peace of mind knowing it’s done right.
Eco-Friendly Stone Landscaping Ideas
You can create a stunning stone garden while still being kind to the environment. Eco-friendly landscaping is about making smart choices that minimize your impact and work in harmony with nature. Luckily, stone is a sustainable material—but you can take it even further.
Using Recycled or Natural Materials
One of the greenest things you can do is reuse what’s already out there. Check local salvage yards or demolition sites for:
Reclaimed bricks or pavers
Broken concrete chunks (also known as “urbanite”)
Old stone slabs or leftover materials from construction sites
These can often be acquired for a fraction of the cost (or free), and they add a rustic, lived-in charm to your garden. You’re also keeping waste out of landfills.
When buying new materials, try to source stones locally. This reduces the environmental toll of long-distance shipping.
Promoting Sustainability in Your Garden
Stone gardens naturally require less water and fewer resources than lawns or flower beds. To boost sustainability:
Pair your stone paths with drought-tolerant plants.
Install a rainwater collection system nearby for irrigation.
Use permeable stone layouts (like gravel or spaced flagstones) to help with groundwater recharge.
You can even integrate solar-powered garden lights along your path for nighttime ambiance without increasing your electricity use.
Sustainable landscaping isn’t just a trend—it’s a smart way to future-proof your garden.
Inspiration and Layout Ideas
Need a little visual spark? Garden stone designs can vary dramatically based on your theme, home style, and personal preferences. Whether you like clean and contemporary or wild and whimsical, there’s a layout for you.
Classic, Modern, and Rustic Designs
Here are some ideas to match your style:
Classic: Symmetrical flagstone walkways lined with low boxwood hedges and stone benches.
Modern: Sleek slate pavers with sharp edges, interspersed with black gravel and minimalist lighting.
Rustic: Irregular stepping stones winding through native plants, accented with driftwood or terracotta pots.
Zen/Japanese: Raked gravel, flat stones, and strategic boulders placed with intention and balance.
Tropical: Warm-hued stones surrounded by lush ferns, palms, and natural wooden edging.
Your stone layout can also lead to a focal point like a firepit, a pond, or a small garden pavilion.
Using Stones with Plants and Water Features
Stone pairs beautifully with natural elements. Here are some combinations that work:
Creeping thyme or moss between flagstones adds green softness and smells amazing when stepped on.
Boulders strategically placed among flower beds add height and visual contrast.
Dry creek beds made of river stones simulate water flow and help with drainage.
Pond edges lined with flat stones make great sitting areas and blend water features into your landscape.
Don’t be afraid to experiment. Mix textures, play with contrast, and use stones not just as a surface—but as a sculptural element in your garden.
Conclusion
Laying stones in your garden isn’t just about creating paths—it’s about transforming your outdoor space into a personalized retreat. From planning and prepping to securing and styling, each step of the process builds toward a garden that’s both beautiful and functional. With a little effort and creativity, you can turn simple stones into the bones of a landscape that lasts for decades.
So roll up your sleeves, sketch out your dream layout, and let the stonework begin. Your garden will thank you with every step you take.
FAQs
1. What is the best stone for garden paths?
Flagstone is one of the best options for garden paths due to its flat surface, natural appearance, and durability. Gravel is another affordable and practical choice for informal paths.
2. How do I prevent stones from shifting over time?
A solid base made of compacted gravel and sand is key. Edging and polymeric sand between stones also help keep everything in place.
3. Can I lay stones directly on soil?
Technically yes, but it’s not recommended. Stones laid directly on soil are prone to shifting, sinking, and weed growth. A gravel or sand base greatly improves stability.
4. How much does it cost to build a stone path?
DIY paths can range from $200 to $800 depending on materials and size. Professional installations may cost $10–$30 per square foot.
5. Are stone paths safe during rainy weather?
They can be, if you use non-slip stones like textured flagstone or gravel. Avoid polished or overly smooth stones, which become slippery when wet.
